How to enable .htaccess in wamp server
How to enable .htaccess in wamp server
In this article,I will explain how to enable .htaccess in wamp server.
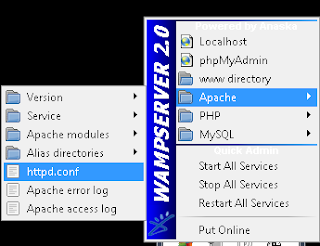
1. Open wamp_server (Go to Wamp -> Right click at icon in the taskbar=> Apache=> httpd.conf)
2.Edit httpd.conf file.
3. Just remove the # sign before the LoadModule rewrite_module modules/mod_rewrite.so
4. Save the file.Mod Rewriting is enabled.
5.Restart the Server(Go to Wamp -> Right click at icon in the taskbar=> Restart All services)
6.Now Create new file.
Copy and paste the following code in it.
Options +FollowSymLinks
RewriteEngine On
7.Save it as .htaccess in the root directory.
8.Done.
We have successfully enabled .htaccess in Wamp server.


Comments
Post a Comment